
Using SnowConvert
This page show how to use Oracle SnowConvert to migrate an Oracle code
This is a deprecated version of the SnowConvert documentation, please visit the official site HERE.
Conversion Process
So how do you use SnowConvert? Follow the steps below on the conversion process, they will walk you through the whole process. The inputs you have to provide and the processes that SnowConvert goes through internally.
Step 1: Declaring the Input and Output Folder
When you first launch Snowflake SnowConvert, you will see the welcome screen shown below.
If you select "Let's Begin" in the middle of the screen, you will be taken to the following screen where you can specify the input and output folders for your conversion.
Input Folder: Your Input folder is the folder where you should place all of the files you are looking to convert. Recall that to get the most value out of your conversion with SnowConvert, you should attempt to include all or as much of the source code as possible in the input folder. You can either click on the browse button or type the path manually.
Output Folder: The output folder is the folder where you would like SnowConvert to put the logs, reports, and output code from the conversion process. Note that each of the filenames for the converted code will be the same as they were in the source code. If you had a tables.sql file in the source code, there will be a tables.sql file in the output folder.
Step 2: Conversion Start and Validation
Note that for both the input and output folder, the program will validate the directories that you've selected. The following validation checks will be done:
To determine if there are "convert-able" files in the input directory. Meaning files with a valid extension (i.e. ".sql" files).
If there are already files in the output directory, you will get a message once you hit "Start Conversion" that will ask you if you would still like to proceed with the conversion and override the existing files.
If one or both of the file paths are invalid. If the output path is valid but the folder does not exist SnowConvert will create the folder.
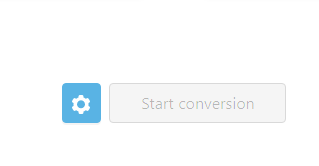
The icon with the gear next to the "Start Conversion" button takes you to the configuration settings page. This page allows you to customize your migration.
Once you have declared an input and an output folder, and you have set your preferred settings, you can select "Start Conversion", and SnowConvert will begin the migration.
Step 3: Conversion States
Once you begin the conversion process, there are three different conversion states that will be updated on the following screen.
Note that you will also get a readout of how many files are being converted, and the total size of the source files.
Snowflake SnowConvert's conversion tasks are divided up as follows:
Loading Source Code: The files inside the input folder are loaded into the migrator. The migrator analyzes the input and prepares to parse through the source code. If there are any errors while loading the files, there will be parsing errors reported in the assessment reports.
Conversion: The conversion process begins and produces some metadata about the loaded files including the size and quantity of the files reported on the screen. While the conversion process is taking place, SnowConvert is building a complete AST (abstract syntax tree) and a complete symbol table to properly create functional equivalence on the output code.
Writing Results: This final state lets you know that the conversion process is complete, and the application is creating the output code and reports to populate the output folder.
During each stage, the cards depicting each stage will change color to indicate what is currently taking place. The loading icon shows that the state is executing. The check icon shows that the state was successfully executed. Finally, if you encounter a red stage with an X icon, it indicates that something went wrong while executing that specific task.
Step 4: Conversion Results
Once the conversion has finished, the "Next" button will be available in the bottom right of the screen. On the next screen, a short summary will be available with some statistics about the conversion that just took place.
Included on this screen are the following:
Total Files: The number of files that SnowConvert processed during the conversion.
Total Issues: Number of warnings and errors that were generated by SnowConvert while converting the files. You can learn more about issues and errors by visiting our page on Issues and Troubleshooting.
Total Parsing Errors: The number of elements that SnowConvert was not able to recognize and process. This can happen due to syntax errors, invalid source code, or language grammar that the tool does not support at the moment. that were not converted due to the parser not being about to process a specific object or element. Again, you can learn more about issues and errors in SnowConvert by visiting our page Issues and Troubleshooting.
Conversion Time: The time it took to convert the files.
Conversion Speed: The speed that SnowConvert was able to convert the source code (in lines of code per second).
Code Conversion Summary: A summary giving you the percentage of total lines of code that were successfully converted by SnowConvert. The conversion percentage is displayed in two different ways:
LOC (Lines of Code): The total number of lines of code that are in the source code files.
Code Conversion Percentage: The percentage of the total lines of code that were successfully converted by SnowConvert.
Object Conversion Summary: A summary giving you the percentage of total objects converted by SnowConvert. Some objects are within another object, this count will be of all total objects. The following details are covered in this summary:
Objects: The number of objects detected in the source code. An object in SnowConvert generally refers to a table, view, procedure, function, macro, ... as well as many others.
Object Conversion Percentage: The percentage of the total objects that were successfully converted by SnowConvert.
After the statistics, there are a few options for examining the output. You can click on one of the following options:
View Reports: This option will take you to the reports folder (inside the folder that you specified before the conversion). This folder was created by SnowConvert during the "Writing Results" section of the conversion process. The following reports are generated:
Assessment Report: This is the report that has all the details regarding your conversion, and lays out how much work will still be required to complete the migration.
Assessment Report (HTML): This report presents similar information to the Assessment Report but in a more graphical and dynamic way. Great for a first or quick look at the overall migration details, conversion percentages, and issues encountered.
There are also 4 CSV files that are included in the reports folder:
Assessment: Contains all the raw data used to build the assessment report.
Top Level Objects: Provides a more detailed overview of the main objects present in your source code.
Top Level Queries: Provides a more detailed overview of the main queries present in your source code.
Issues: This may be the most critical report. SnowConvert collects each issue found in the conversion, lists the severity level of each issue, and gives you the exact location in the source code where that issue took place. If you're interested in what went wrong with the migration, visit the assessment report, and immediately come here. For more information on issues in SnowConvert, visit our page on Issues and Troubleshooting.
View Log Folder: This option will take you to the folder containing the log files. The logs are text files that contain time-stamped entries that illustrate the process that SnowConvert has gone through. If there is a critical error, the logs will be the best place to troubleshoot what went wrong, and exactly when did it go wrong. The main log file in this folder:
Conversion Log: The conversion log is always included in any run of SnowConvert, and contains timestamped information related to every step of the conversion process in addition to the information found in the errors log.
View Output: This option will take you to the output folder where you will find your now migrated code. The folder will have the same structure as the input folder and the files will have the same name. There might also be an additional folder called UDF Helpers, this folder contains functions created by SnowConvert to simulate some behaviors.
New Execution: This button will close and restart SnowConvert to run a new migration. The migrator needs to reset between runs, so this is required if you want to run SnowConvert again (even on the exact same workload). It is not required to use this button, however, closing and starting it from your desktop will have the exact same effect.
Application Errors
In this section, you are going to see possible errors that may show up in the SnowConvert application and the cause. Note that these are not errors with the parsing or conversion of the code. All parsing and conversion errors and warnings are described in the Issues and Troubleshooting section of this documentation.
The following types of errors are going to be the most common.
Input and Output Errors
In step 1 of the conversion process, you have to declare an input and output folder for the conversion. You could receive one of the following error messages below if there's an error with the chosen input/output folder.
Please enter an input path.
If you type an invalid file path or don't browse to a folder in either the input or output directory, you will get a short error in the window asking you to "Please enter an input [or output] path."

The resolution of this error is pretty simple, you have to type a path that exists or choose a folder in the browse menu.
Input folder must contain [the correct] extensions.
If you choose a folder that doesn't have any files that can be converted by SnowConvert, then you will get the following error message: "Input folder must contain .sql extensions (Or .bteq .btq .fl .fload .ml or .mload for SnowConvert Teradata)."
The resolution of this error requires you to choose a directory that has one of the supported file extensions.
The path must have the valid format (Can't contain / : * ? " < > |).
If you choose a file path that contains an invalid character, you will get the following error message: "The path must have the valid format (Can't contain / : * ? " < > |)."
You will need to choose a folder that has a valid file path and doesn't include any invalid characters.
Output folder isn't empty!
A warning will come up when you try to execute SnowConvert and the output folder is not empty. This will not come up when you attempt to write an input/output folder name, but rather when you click "Start Conversion". The warning looks like this:

You can click the cancel button and select another folder or proceed with the risk of potentially overwriting certain files. If SnowConvert is writing a file with the same name as one that is already in the output folder, the file will be overwritten.
Note: Folders located in network paths are not supported. The folder must be local to the computer running SnowConvert.
Conversion process errors
In the conversion process, you are going to see if a state has an error, the icon will change to an "X".
Report errors
When you try to see the report's summary and it has errors you are going to see an incomplete conversion page and a button to open the log folder containing the reports.
System errors
If the system crashes, you are going to see the "Something went wrong" message. In this message, you will be given the option to send an email to [email protected] with this error report in order for the SnowConvert team to improve the tool.
Configuration and Settings
When you first start Snowflake SnowConvert, you will see the following screen:
Notifications
Each time you start SnowConvert, the program will check to see if you have any notifications. These will appear in the top right corner of the screen. If you do not have any notification, nothing will appear. The most common type of notifications that you will receive is listed below.
Update Available
Snowflake is constantly working to improve SnowConvert. If there is an update available, you will get a notification indicating that you may download the latest version. There will be an "Update" button in the notification, and you can download the newest version by simply pressing that button. The download will automatically start. You do not need to enter a new license, the information will be kept automatically. Once the download is complete, you will be prompted to run the installer. The upgrade installation for SnowConvert will behave exactly as though you are downloading it for the first time (with the exception that you will not have to re-enter your license information).
When you launch the upgraded version for the first time, it will prompt you to see the release notes about this latest version of the tool. This will open your default browser and take you to the release notes section of our documentation site.
License expiration
If you have a time-based license, you will receive notifications as you approach the end of your license period. These will come in three different stages:
The first notification will let you know that your license expires in 15 days.
The second will notify that your license expires in 2 days.
You will get a final notification if you open SnowConvert and your license has expired. Indicating that you need to renew your license.
Note that you will not be able to use the migrator if your license has expired.
You will be prompted to reach out to [email protected] by each of these notifications to renew your license.
If you are using a lines-of-code-based license, you will not get a notification when you try to run the migrator indicating that the following run will exceed your maximum lines of code. As with the time-based license, you will be prompted to reach out to [email protected] to renew or upgrade your license.
Conversion Settings
If you want to configure any of the settings before migrating you can open the Conversion Settings window. It can be opened in two different ways:
You can click File (in the top left of the application) -> Settings.
You can click the gear icon next to the "Start conversion" button.
Both options will bring up the following screen:
Once you have started the conversion process, you can not change any of these settings unless you restart SnowConvert.
There are five pages in the Conversion Settings Window:
General.
DB Object Names.
Prepare Code.
Conversion Rate.
Stored Procedures Target Language.
These pages are described in more detail below.
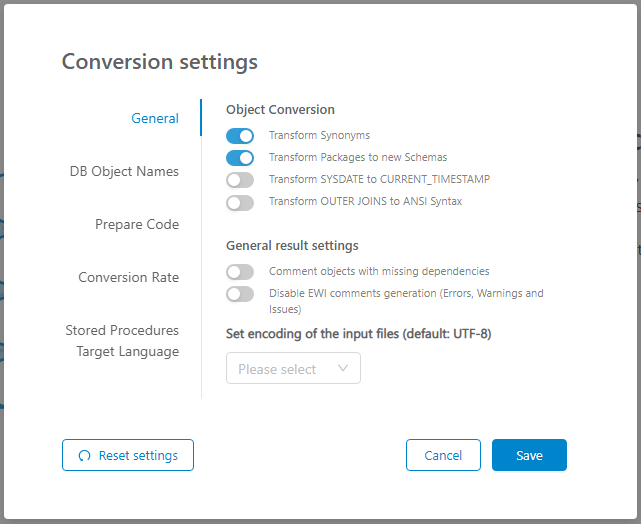
1. General
Transform Synonyms: Indicate whether or not Synonyms should be transformed. This will also change all the references to the synonyms to point to the original object.
Transform Packages to new Schemas: Indicate whether or not the Packages should be transformed to new Schemas.
Please check the naming of the procedure enabling and disabling the checkbox:
Transform Date as Timestamp: Indicate whether SYSDATE should be transformed to CURRENT_DATE or CURRENT_TIMESTAMP. This will also affect all DATE columns, they will be transformed to TIMESTAMP. An example is given below with a table that contains a DATE type column and a query with SYSDATE:
If you enable this option, then the resulting code will be:
If you disable this option, then the resulting code will be:
Transform OUTER JOINS to ANSI Syntax: Indicate whether outer joins using Oracle Syntax (+) are always transformed to ANSI Syntax.
Generate debug log: This allows you to specify if you want a debug log to be written while SnowConvert is performing the conversion. Note that you will get a general conversion log and various reports each time you run the tool. The debug log is very detailed and can be helpful in working through any critical errors that may have occurred during the conversion process. This log is set to be generated by default unless you change it here.
Comment objects with missing dependencies: SnowConvert can comment out dependencies that are not created in the source code or it can provide a comment in the output code that declares that a given dependency is missing. The default setting is to provide a comment declaring that a dependency is missing, but the code will still be converted. An example is given below with one single view created without the declaration of any dependencies:
If you leave the default setting, this is the resulting code:
If you enable this option, then the resulting code will be:
Note that SnowConvert uses an Abstract Syntax Tree (AST) to build relationships between each of the elements in the code you are converting. Due to this architecture, the more complete the codeset you put into SnowConvert, the more complete your output will be. As an example, if you have a table that is created in one .sql file and called in another, but you have not included the .sql file in the input folder, SnowConvert will still convert the input code but will give you a "missing dependency object" warning regarding the missing table (as illustrated above). You could encounter some more serious errors if multiple dependencies are excluded, so please try to include the most complete version of your source code in the Input folder.
2. DB Object Names
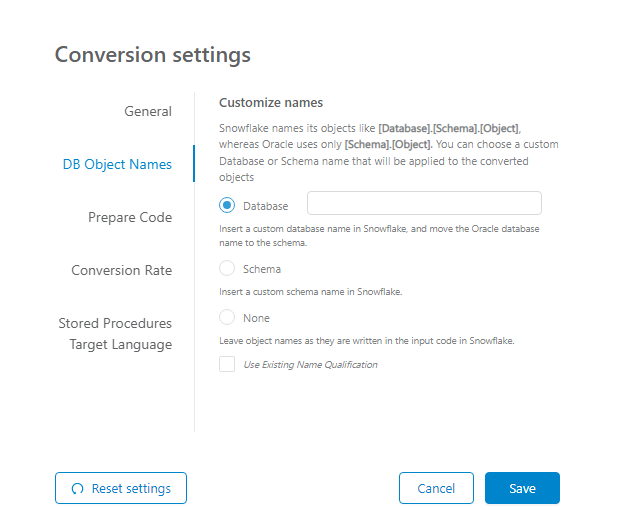
On this page, you can set the database or schema name that can be applied to the objects that are converted by SnowConvert.
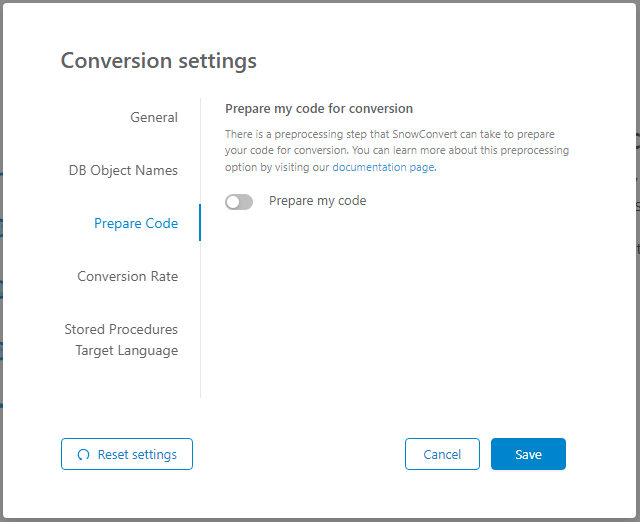
3. Prepare Code
On this page, you can set database or schema names that can be applied to the objects that are converted by SnowConvert. Snowflake uses the DATABASE.SCHEMA.OBJECT naming convention, let's take for example the following code and then we will convert it with the available conversion options:
Schema: If you'd prefer the Teradata database name to be used as the schema name, then you can specify a database name to be applied to the Snowflake output instead. If you specify a Schema Name
MyCompanySchema, you will get the following converted code:
Database: And, if you specify a Database name
MyCompanyDb, you will get the following converted code:
None (default): With this option, no additional schemas or databases will be added to the input code. The output names will remain the same. As seen below:
Use Existing Name Qualification: This is a flag, it is only available when a Schema or Database options above are selected. It preserves the name qualification from the input code, placing either Schemas or Databases only where they are missing. Opposite, when this flag is disabled, it will add Schemas or Databases everywhere, overwriting those that come in the input code. See the examples below where a new schema is included:
4. Conversion Rate
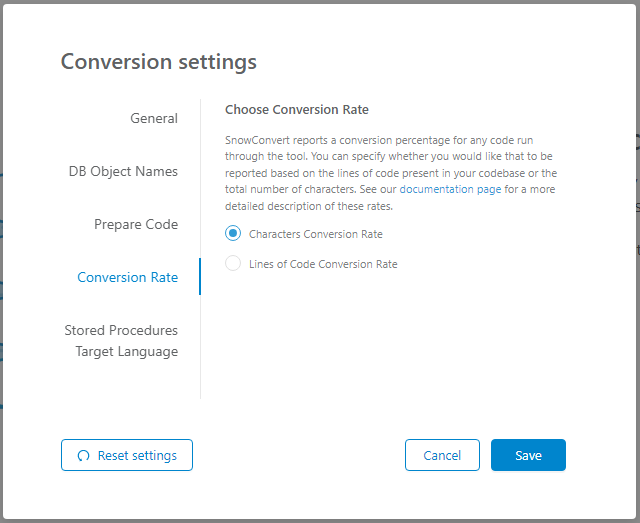
On this page, you can choose whether the successfully converted code percentage is calculated using lines of code or using the total number of characters. Characters conversion rate is the default option.
5. Stored Procedures Target Language
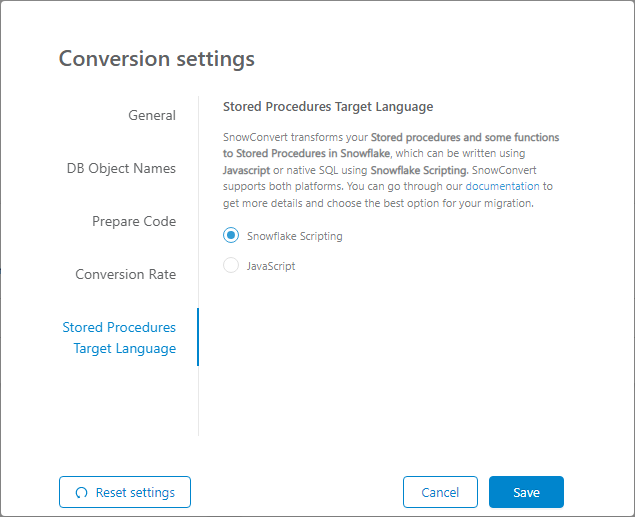
On this page, you can choose whether stored procedures are migrated to JavaScript embedded in Snow SQL, or to Snowflake Scripting. The default option is Snowflake Scripting.
Reset Settings
While not a separate page, the reset settings option appears on every page. If you've made changes, you can reset SnowConvert to its original settings. When you select this option, you will be prompted to reset the settings on only this page or every page in the configuration settings.
Help Menu
The help menu can be found in the top left corner of the SnowConvert screen. When you choose the help menu, you will get the following options.
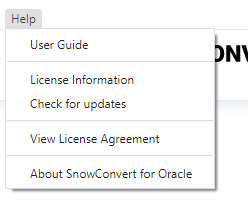
User Guide
The user guide is this documentation site that you are reading right now. By clicking on "User Guide", your default browser will open and you will be taken to the documentation site for SnowConvert.
License Information
This will give you information about your license and will allow you to change or update your current license. It will also let you know who the license is registered to, what execution mode this license is available for (assessment or full conversion), and when the license expires.
Check for Updates
SnowConvert should check for updates every time it starts up. However, if you're not sure whether or not you have the latest version, you can select this option and the program will check for updates. If an update is available, you will be given the option to download it. If there are no updates available, you will get a brief message indicating that "you're up to date!"
View License Agreement
This will open the End-user license agreement file with the terms and conditions for Snowflake SnowConvert. Brace for some legalese, but if you're looking for the terms and conditions of use for this product, look no further.
About SnowConvert for Oracle
Finally, this will give you some basic information about the version of SnowConvert that you are currently running, including what version of the application you are currently running and what version of the conversion core the application is using. Sometimes there are updates to the conversion core and not the rest of the application. That should be illustrated here.
Last updated